
Hello, Universe. Yup, ini adalah post pertama yang saya buat di blog ini. Pada post kali ini, saya akan menjelaskan bagaimana saya membuat blog ini. Saya juga akan menyertakan referensi dan sumber terkait yang berhubungan dengan pembuatan blog ini. Semoga dapat menjadi referensi teman-teman yang mungkin berniat untuk mem-publish GitHub Pages. Dimohon kepada teman-teman yang membaca ini untuk dapat membaca post ini dari awal sampai akhir tanpa skip dan sangat dianjurkan untuk membuka link atau referensi yang saya cantumkan di post ini.
Prerequisities
Machine Specification
Kita mulai dengan machine specification. Blog ini dibuat di laptop pribadi saya. Melihat output dari About This Mac, berikut spesifikasi laptop yang saya gunakan saat menulis post ini:
- macOS Monterey
- MacBook Pro (14-inch, 2021)
- Chip Apple M1 Pro
- Memory 16 GB
Lebih detilnya, blog ini juga dibuat pada virtualized environment sebagai berikut:
- Virtualization Software: UTM
- OS: Kali Linux ARM64
Karena saya menggunakan Linux, maka mungkin langkah-langkah yang akan saya jelaskan disini cenderung lebih relate dengan environment Linux dan MacOS. Tapi saya yakin sebagian besar dari langkah-langkah yang dituliskan disini juga dapat dijadikan sebagai acuan untuk teman-teman yang menggunakan Windows.
GitHub Pages
GitHub Pages menurut saya merupakan sebuah service dari GitHub yang memungkinkan user untuk meng-hosting project yang dimilikinya. Blog ini pun dibuat dengan GitHub Pages. Selengkapnya tentang GitHub Pages bisa teman-teman lihat di webpage GitHub Pages:
Hugo
Selanjutnya adalah Hugo. Hugo merupakan static site generator yang saya pakai untuk membuat blog ini. Static site generator ini biasanya digunakan untuk membuat static site seperti blog, website untuk documentation, digital portfolio, dll. Terdapat berbagai macam static site generator selain Hugo, salah satu yang terkenal adalah Jekyll. Berikut beberapa referensi (YouTube Playlists) yang saya tonton untuk mempelajari Hugo dan Jekyll:
Introduction to Hugo | Hugo - Static Site Generator | Tutorial 1
Introduction | Jekyll - Static Site Generator | Tutorial 1
Pada post ini, saya hanya akan menjelaskan tentang Hugo. Untuk Jekyll teman-teman bisa coba untuk explore dan experiment sendiri.
References
Berikut beberapa referensi yang membantu saya dalam membuat blog ini:
- Linux Fundamentals via https://linuxjourney.com/
- Git via https://git-scm.com/
- Akun GitHub via https://github.com
- Fundamental Git dan GitHub via https://youtu.be/lTMZxWMjXQU?list=PLFIM0718LjIVknj6sgsSceMqlq242-jNf (YouTube Playlist)
- Text Editor (Visual Studio Code) via https://code.visualstudio.com/
- Golang via https://go.dev/
- Hugo (Extended) via https://gohugo.io/
- Hugo Themes via https://github.com/CaiJimmy/hugo-theme-stack
- Hugo and GitHub Pages Tutorial via https://youtu.be/LIFvgrRxdt4
Setup Environment Git
- Set konfigurasi username Git (disarankan untuk disamankan dengan username GitHub) dengan command
git config --global user.name "<username-github>". - Set konfigurasi email Git (disarankan untuk disamakan dengan email yang digunakan untuk akun GitHub) dengan command
git config --global user.email "<email@email>.com".
Instalasi Hugo
- Pertama, clone repository Hugo dengan command
cd ~ && git clone https://github.com/gohugoio/hugo.git. - Setelah itu pindah ke repository Hugo yang sudah di-clone pada local dengan command
cd hugo. - Terakhir install Hugo Extended dengan command
go install --tags extended.
Membuat Blog dengan Hugo dan GitHub Pages
Membuat Repository GitHub
- Pertama, buat sebuah repository kosong pada GitHub. Repository ini akan digunakan untuk menampung environment dev dari blog yang sudah dibuat. Teman-teman disarankan untuk memberikan nama yang sekiranya sesuai untuk repository ini, contohnya “blog”.
- Kedua, buatlah repository dengan format nama “<username-github>.github.io”. Repository ini nantinya akan menampung environment prod dari blog yang sudah jadi.
Merancang Blog pada Environment Dev
-
Membuat site baru dengan command
hugo new site blog -f yml. Flag-fdigunakan untuk membuat file config dengan ekstensi.ymlkarena pada pengaturan default, file config dibuat dengan ekstensi.toml. Dengan menjalankan command tersebut, Hugo akan membuat sebuah blog beserta templates-nya pada directory dengan nama yang sama yaitu directory blog. -
Pindah ke directory yang telah di-generate dengan command
cd blog. -
Inisialisasikan repository Git pada directory blog dengan command
git init. -
Menambahkan tema Stack pada directory blog dengan command
git submodule add https://github.com/CaiJimmy/hugo-theme-stack/ themes/hugo-theme-stack. -
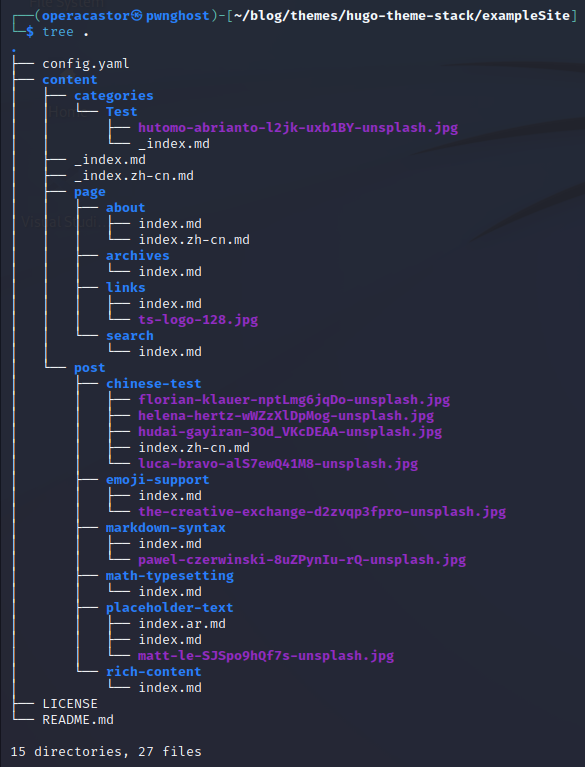
Selanjutnya teman-teman dapat melakukan kustomisasi terhadap tampilan blog sesuka hati teman-teman. Terdapat beberapa template yang sudah dibuatkan oleh creator pada directory ~/blog/themes/hugo-theme-stack/exampleSite yang berisikan beberapa file dan directory lainnya seperti pada gambar berikut:
Beberapa modifikasi yang dapat dilakukan adalah:
-
Meng-copy isi dari ~/blog/themes/hugo-theme-stack/exampleSite/content/ ke ~/blog/content/ dengan command
cp ~/blog/themes/hugo-theme-stack/exampleSite/content/* ~/blog/content. -
Kemudian meng-copy file ~/blog/themes/hugo-theme-stack/exampleSite/.gitignore ke ~/blog/.gitignore dengan command
cp ~/blog/themes/hugo-theme-stack/exampleSite/.gitignore ~/blog/.gitignore. -
Lalu meng-copy file ~/blog/themes/hugo-theme-stack/exampleSite/config.yaml ke ~/blog/config.yml dengan command
cp ~/blog/themes/hugo-theme-stack/exampleSite/config.yaml ~/blog/config.yml. -
Melakukan kustomisasi pada file ~/blog/config.yml, saya sendiri mengubah isi file tersebut menjadi seperti berikut:
1 2 3 4 5 6 7 8 9 10 11 12 13 14 15 16 17 18 19 20 21 22 23 24 25 26 27 28 29 30 31 32 33 34 35 36 37 38 39 40 41 42 43 44 45 46 47 48 49 50 51 52 53 54 55 56 57 58 59 60 61 62 63 64 65 66 67 68 69 70 71 72 73 74 75 76 77 78 79 80 81 82 83 84 85 86 87 88 89 90 91 92 93 94 95 96 97 98 99 100 101 102 103 104 105 106 107 108 109 110 111 112 113 114 115 116 117 118 119 120 121 122 123 124 125 126 127 128 129 130 131 132 133 134 135 136 137 138 139 140 141 142 143 144 145 146 147 148 149 150 151 152 153 154 155 156 157 158 159 160 161 162 163 164 165 166 167 168 169 170 171 172 173 174 175 176 177 178 179 180 181 182 183 184 185 186 187 188 189 190 191 192 193 194 195 196 197 198 199 200 201 202 203 204 205 206 207 208 209 210 211 212 213 214 215 216 217 218 219 220 221 222 223 224 225 226 227 228 229 230 231 232 233baseurl: https://<username-github>.github.io/ # Diisi dengan GitHUb Pages https://<username-github>.github.io languageCode: id-id # Diisi dengan language code, jika berbahasa asing maka dapat disesuaikan, contohnya menjadi "en-us" untuk American English theme: hugo-theme-stack paginate: 5 title: <username-github> Blog # Diisi dengan nama blog yang diinginkan languages: id: languageName: Bahasa Indonesia title: <username-github> Blog description: Selamat Datang di Blog Saya weight: 1 en: languageName: English title: <username-github> Blog description: Welcome to My Blog weight: 2 # Change it to your Disqus shortname before using disqusShortname: hugo-theme-stack # GA Tracking ID googleAnalytics: # Theme i18n support # Available values: ar, bn, ca, de, el, en, es, fr, hu, id, it, ja, ko, nl, pt-br, th, uk, zh-cn, zh-hk, zh-tw DefaultContentLanguage: id # Set hasCJKLanguage to true if DefaultContentLanguage is in [zh-cn ja ko] # This will make .Summary and .WordCount behave correctly for CJK languages. hasCJKLanguage: false permalinks: post: /p/:slug/ page: /:slug/ params: mainSections: - post featuredImageField: image rssFullContent: true favicon: /img/favicon.ico footer: since: 2022 customText: dateFormat: published: Jan 02, 2006 lastUpdated: Jan 02, 2006 15:04 MST sidebar: emoji: subtitle: Welcome to my INFOSEC blog avatar: enabled: false local: true src: img/avatar.png article: math: false toc: true readingTime: true license: enabled: true default: Licensed under CC BY-NC-SA 4.0 comments: enabled: false provider: disqus disqusjs: shortname: apiUrl: apiKey: admin: adminLabel: utterances: repo: issueTerm: pathname label: remark42: host: site: locale: vssue: platform: owner: repo: clientId: clientSecret: autoCreateIssue: false # Waline client configuration see: https://waline.js.org/en/reference/component.html waline: serverURL: lang: pageview: emoji: - https://unpkg.com/@waline/emojis@1.0.1/weibo requiredMeta: - name - email - url locale: admin: Admin placeholder: twikoo: envId: region: path: lang: # See https://cactus.chat/docs/reference/web-client/#configuration for description of the various options cactus: defaultHomeserverUrl: "https://matrix.cactus.chat:8448" serverName: "cactus.chat" siteName: "" # You must insert a unique identifier here matching the one you registered (See https://cactus.chat/docs/getting-started/quick-start/#register-your-site) giscus: repo: repoID: category: categoryID: mapping: lightTheme: darkTheme: reactionsEnabled: 1 emitMetadata: 0 gitalk: owner: admin: repo: clientID: clientSecret: cusdis: host: id: widgets: homepage: - type: search - type: archives params: limit: 5 - type: categories params: limit: 10 - type: tag-cloud params: limit: 10 page: - type: toc opengraph: twitter: # Your Twitter username site: # Available values: summary, summary_large_image card: summary_large_image defaultImage: opengraph: enabled: false local: false src: colorScheme: # Display toggle toggle: true # Available values: auto, light, dark default: auto imageProcessing: cover: enabled: true content: enabled: true ### Custom menu ### See https://docs.stack.jimmycai.com/configuration/custom-menu.html ### To remove about, archive and search page menu item, remove `menu` field from their FrontMatter menu: main: [] social: - identifier: github name: GitHub url: https://github.com/<username-github> params: icon: brand-github - identifier: twitter name: Twitter url: https://twitter.com/<username-twitter> params: icon: brand-twitter related: includeNewer: true threshold: 60 toLower: false indices: - name: tags weight: 100 - name: categories weight: 200 markup: goldmark: renderer: ## Set to true if you have HTML content inside Markdown unsafe: false tableOfContents: endLevel: 4 ordered: false startLevel: 2 highlight: noClasses: false codeFences: true guessSyntax: true lineNoStart: 1 lineNos: true lineNumbersInTable: true tabWidth: 4
-
-
Setelah melakukan semua langkah di atas, teman-teman dapat melihat tampilan blog dengan menggunakan command
cd ~/blog && hugo serverlalu buka http://localhost:1313/ pada browser. Step ini akan memperlihatkan tampilan sementara dari web atau blog yang akan di-publish. Sebagai tambahan, teman-teman juga dapat menambahkan post, meng-custom halaman about, membuat kategori, dll. Jika terdapat error, maka teman-teman dapat melihatnya di terminal saat menjalankan commandhugo server. -
Setelah itu lakukan commit dengan command
cd ~/blog && git add -A && git commit -m "Initial Commit".
Push Environment Dev ke Repository GitHub
- Buka terminal pada local, lalu pindah ke directory environment dev blog dengan command
cd ~/blog. - Tambahkan remote repository ke directory environment dev dengan command
git remote add origin https://github.com/<username-github>/blog.git && git branch -M main && git push -u origin main. - Pastikan bahwa environment dev telah berhasil di-push ke GitHub.
Merancang Blog pada Environment Prod
- Selanjutnya lakukan clone repository GitHub Pages ke local dengan command
cd ~ && git clone https://github.com/<username-github>/<username-github>.github.io.git. - Lalu pindah ke repository yang telah di-clone dengan command
cd <username-github>.github.io. - Pindah ke branch main dengan command
git checkout -b main. - Buat sebuah file README.md.
- Lakukan commit dengan command
git add -A && git commit -m "Initial Commit". - Push ke GitHub dengan command
git push origin main. - Beralih ke directory environment dev dengan command
cd ~/blog. - Buat sebuah directory bernama production dengan command
mkdir production. - Menyambungkan repository environment dev ke directory *production dengan command
git submodule add -b main https://github.com/<username-github>/<username-github>.github.io.git production. - Meng-generate versi final dari blog pada environment dev ke directory production dengan command
hugo -D -d production. - Lalu membuat sebuah file kosong dengan nama .nojekyll pada directory production dengan command
touch ./production/.nojekyll. - Lakukan commit sekali lagi dengan command
git add -A && git commit -m "Production Commit".
Push Environment Prod ke Repository Github
- Pindah ke directory production yang telah dibuat dengan command
cd ~/blog/production. - Lalu push ke remote repository dengan command
git push origin main.
Memperbarui Blog
- Untuk meng-update blog dapat dilakukan dengan menambahkan perubahan pada environment dev atau pada kali ini yaitu dalam directory ~/blog/.
- Hasil pembaruan dapat dilihat dengan menggunakan command
hugo server. - Setelah itu save seluruh file yang telah di-update, lalu generate hasil update ke directory production dengan command
cd ~/blog && hugo -D -d production, melakukan commit dan push ke remote repository <username-github>.github.io dengan commandcd ~/blog/production && git add -A && git commit -m "Production Commit" && git push origin main.